Multi Factor Login
Multi-Factor Login
The multi-factor login allows a user to gain access to an application by entering their authentication information step by step, such as username and password. For additional login methods, see:
Identity First
For identity first, a user will input the username and password separately and may not be required to enter a password if other authentication mechanisms are used (for example fingerprint, two-way ssl, etc.). Also, it allows automatically redirecting to an external IdP when the user is linked to an external IdP.
Step 1
Step 2
Additional Authentication Methods
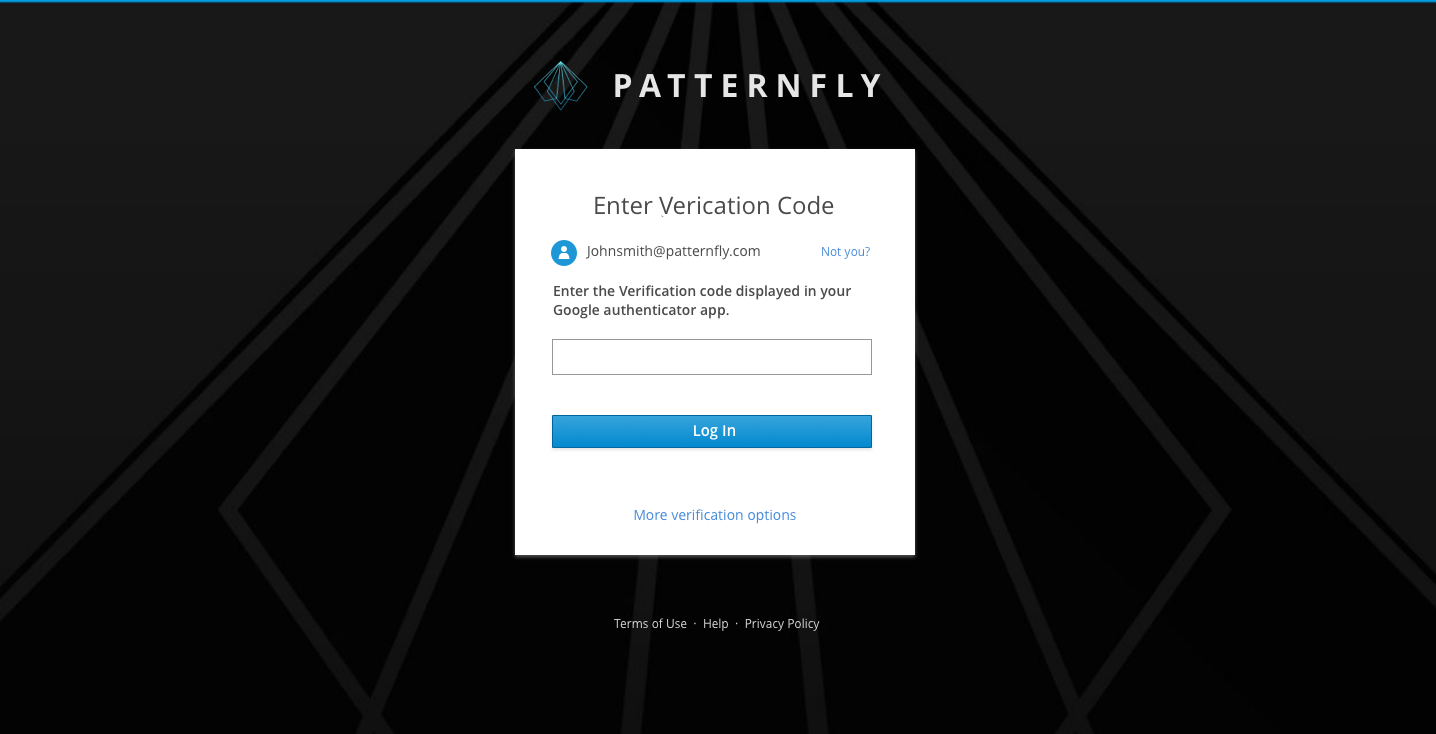
Besides a password, additional information may be required if the user has enabled multi-factor authentication. The additional information could be an authentication code, a SMS code or a backup code.
Authenticator Login
User can bind the authenticator which installed on their mobile phones with their accounts. If so, they can login with the code that authenticators provide.
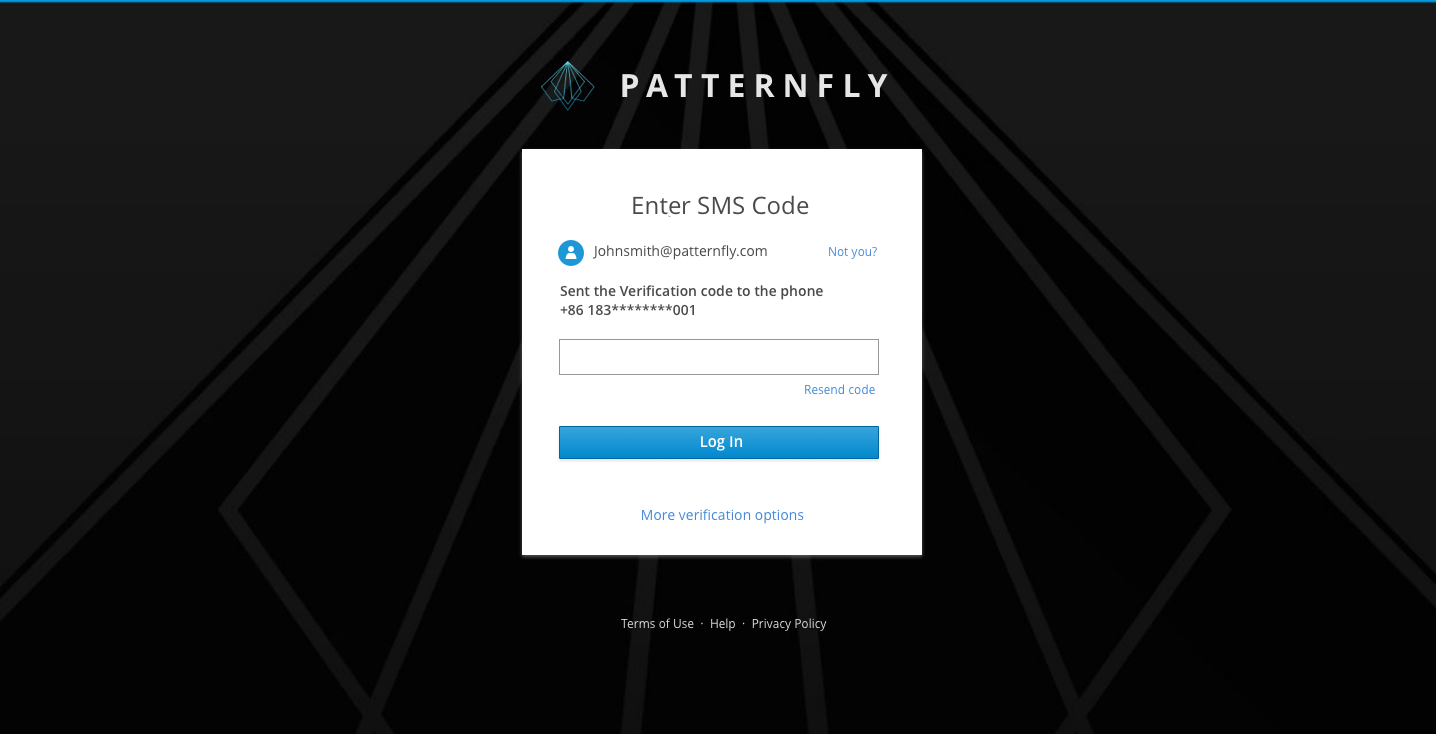
SMS Login
Users can bind their phone numbers (or backup phone numbers) with their accounts. If so, they can login with SMS codes.
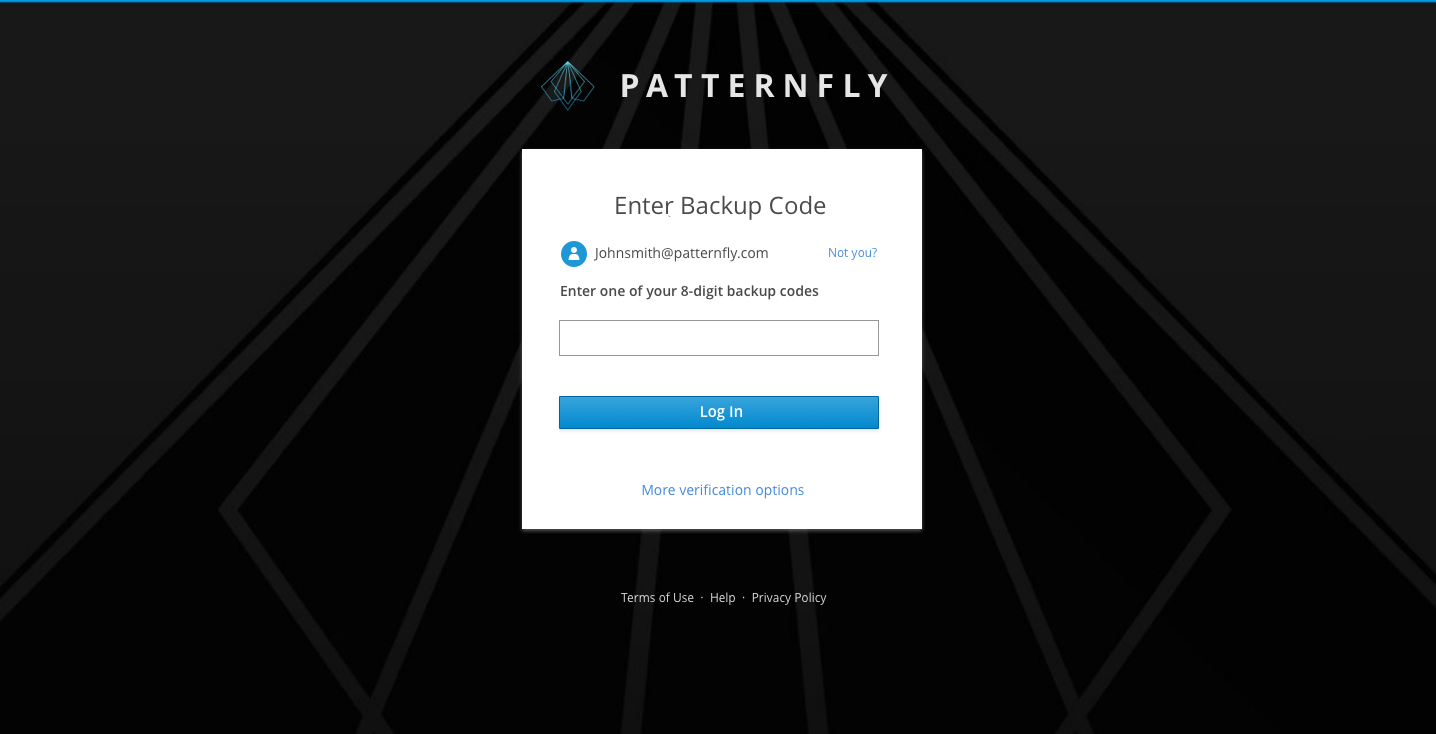
Backup Code Login
Backup codes (random strings) can be provided to users as an alternative authentication method. Users can login with backup codes instead of authentication codes or SMS codes.
Multi-Factor Login
Identity First
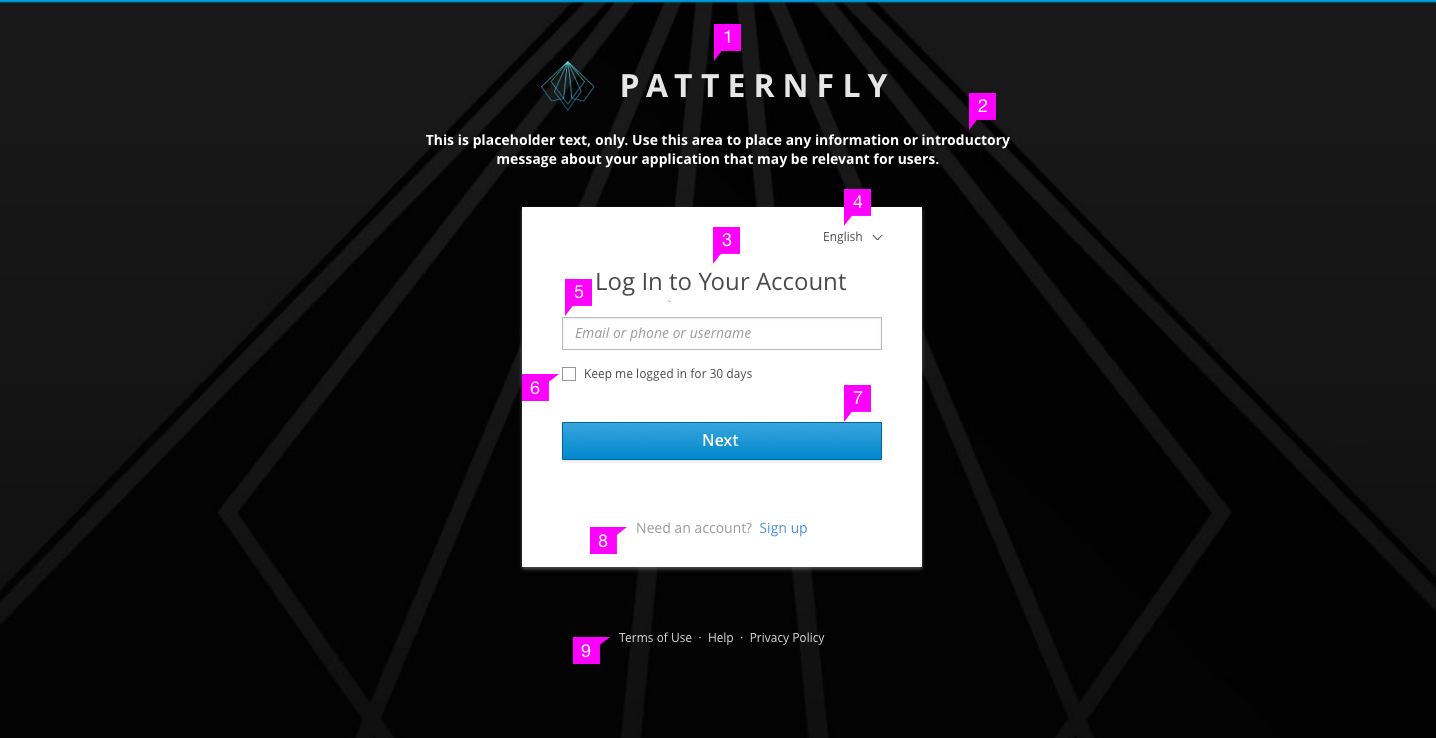
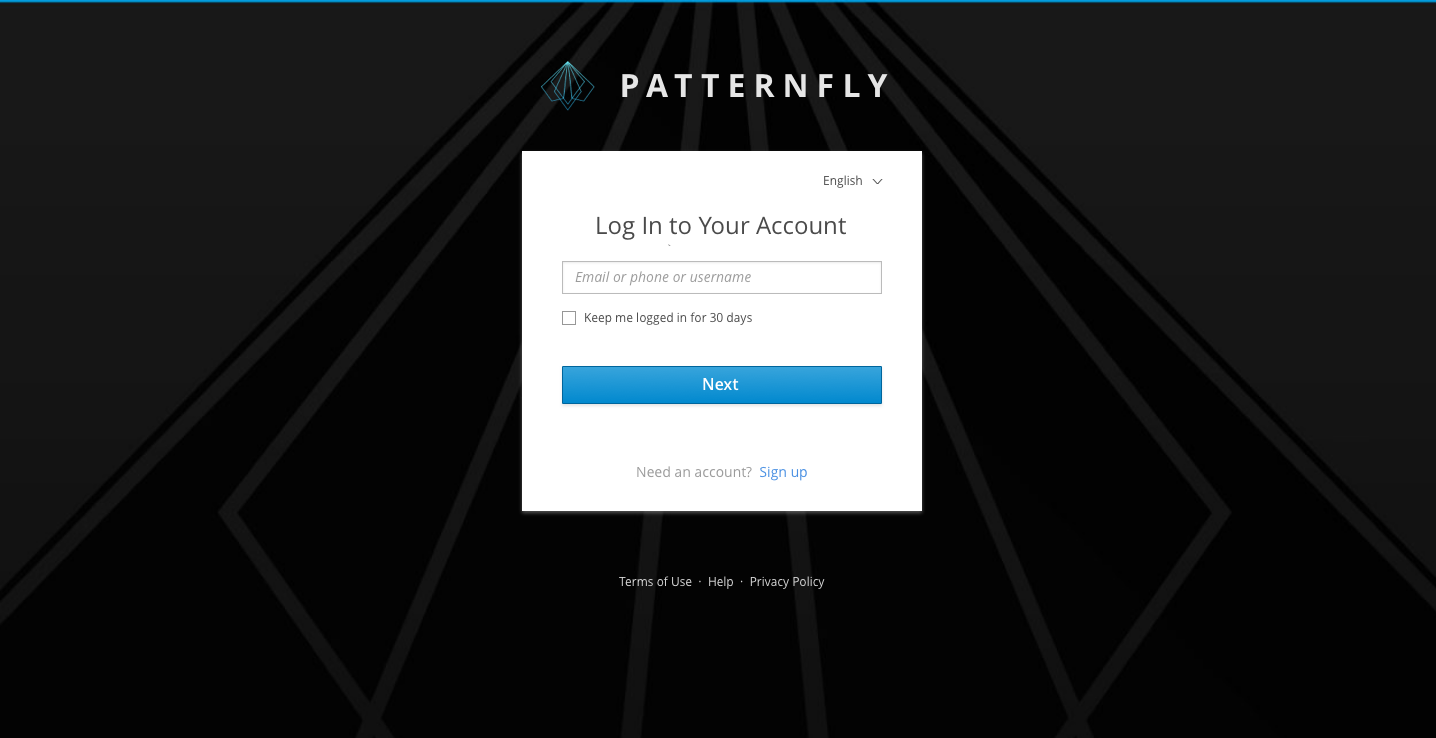
- Logotype: The product logo is placed at the top.
- Description (optional): Description of the website can be placed here.
- Title: The title is located at the top of the login card. “Your Account” can be replaced by the product name or any other term that makes sense for your application.
- Language Selector (optional): The language selector is located in the top right of the login card.
- Username Field: Include only a username field as the password will be requested in a separate step.
- Checkbox (optional): Checkbox is located under the Required fields. It can be labeled varied texts depending on the needs of different applications. Checkbox labels should be capitalized according to Terminology and Wording Style Guide.
- Next Button: Replace “Log In” with “Next” since this will be a two step process. When the user clicks the “Next” button, the software will validate that this user exists and they will then be prompted to enter a password. If this user does not exist, an error message should be returned.
- Sign up (optional): The page will jump to the sign up flow after clicking the “Sign up” link.
- Links (optional): You may add any additional links to pages where the user can get more information or help.
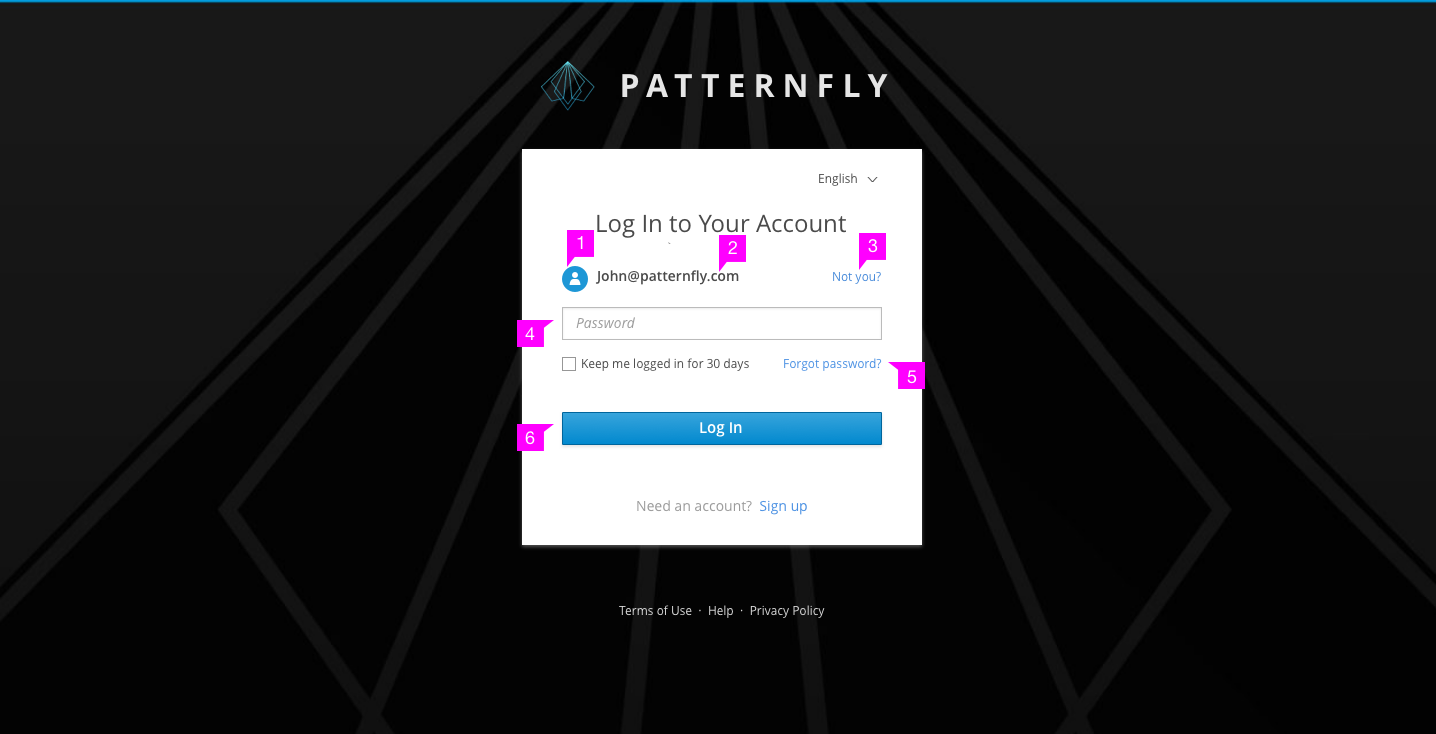
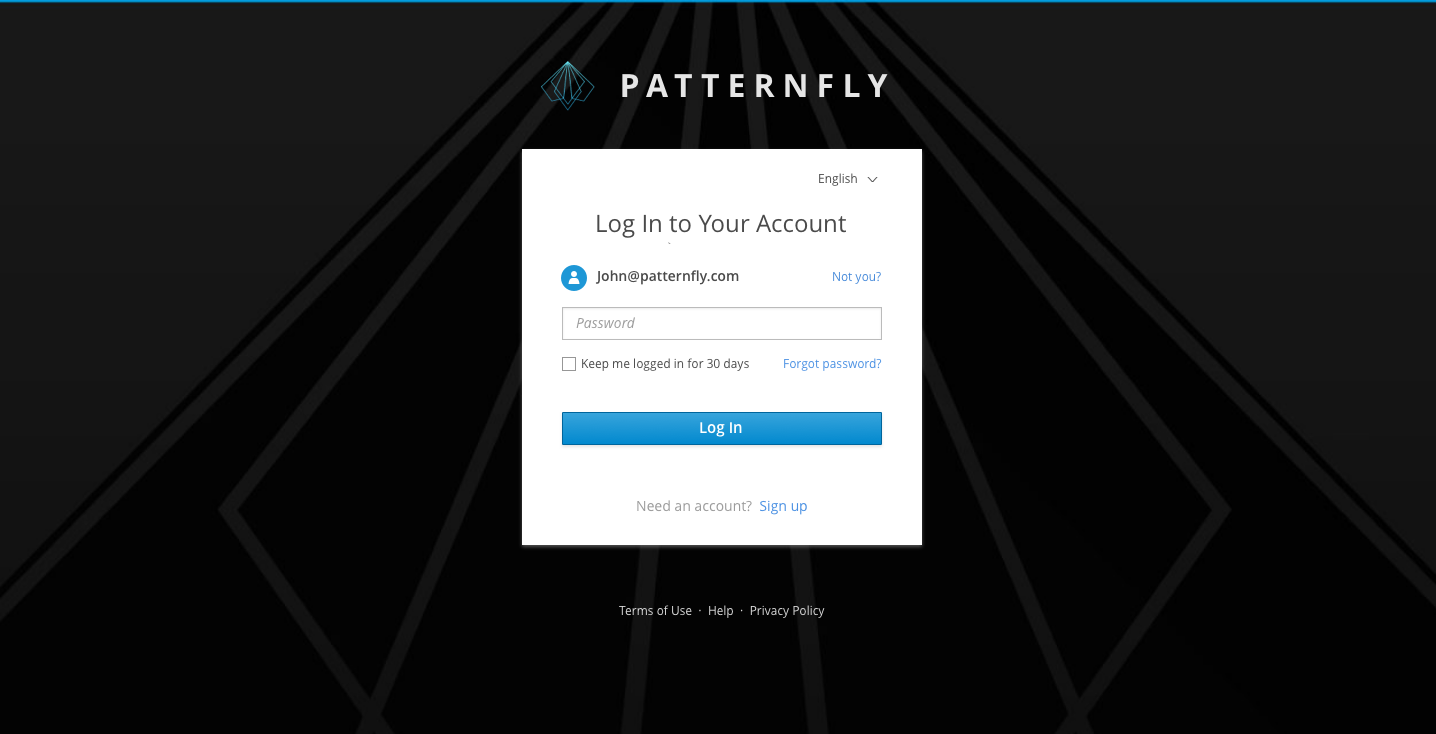
- Avatar (optional): If the user has logged in this device before, his avatar will be displayed after the username is confirmed.
- Validated Username: After successful verification, the username should change to read-only mode in this page.
- Return Link: Users can change username by clicking the “Not you?” link on the far right. After clicking the link, the card will return to the text field mode as the previous page.
- Password Field: If needed, users should input password to log in.
- Help Link (optional): It is a link for users to recover their password.
- Login Button: If there are more steps for authentication, the button should be called “Next” instead of “Log In”.
Multi-Factor Login Example
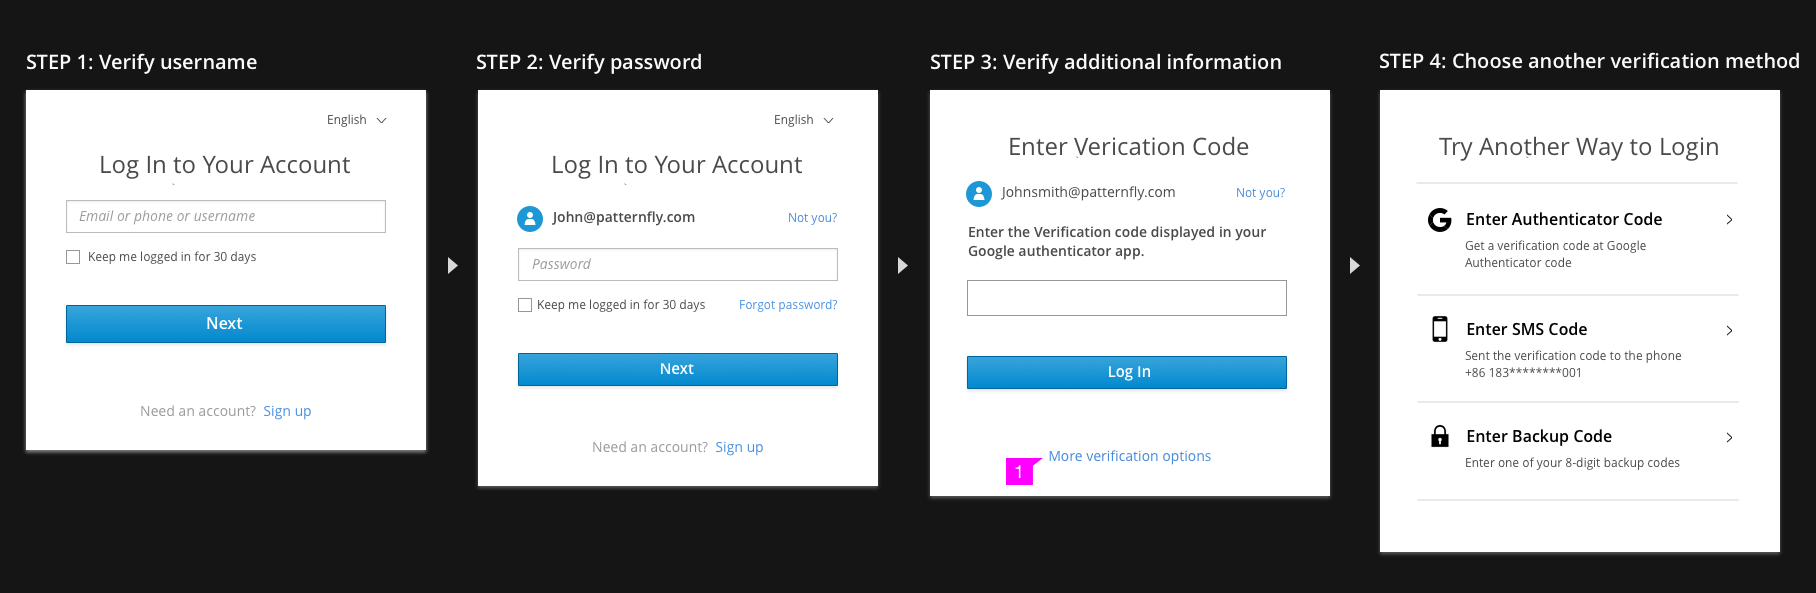
- More Verification Options (optional): When there are additional verification options, users can switch between them through this link if they can’t finish the current one. The link will lead to followed step.
- View Angular PatternFly Example
- View PatternFly NG Example
- View PatternFly React Example
PatternFly Core Example Not Available
There is no PatternFly-Core code available for this pattern at this time. Links to the JS framework implementations can be seen above.
Visit the Contributing to PatternFly documentation to learn how to contribute the code.